Unboxing a new pizza oven is exciting, but that excitement can quickly turn into confusion if you’re not sure where to start. Wood pellet ovens, in particular, come with their own setup process, one that’s different from gas or charcoal models. Getting it right from day one makes a real difference in how quickly you start producing consistent, high-quality pizzas.
This guide walks through the entire process, from what to check right out of the box to firing up your very first bake, so you can skip the trial-and-error phase most beginners go through.
Step 1: Unboxing and Initial Inspection
Before doing anything else, carefully unpack your oven and check for any shipping damage. Wood pellet ovens often include several components, the main body, a pellet hopper, an auger system, a base or stand, and various accessories like a pizza peel or thermometer.
Lay everything out and compare it against the included parts list. This is also a good time to inspect for dents, cracks, or loose components that may have shifted during shipping.
See also: How to Maintain a Sauna Kit So It Lasts for Years
Step 2: Choosing the Right Location
Placement matters more than most people expect. Your pellet pizza oven needs a stable, level, non-flammable surface with adequate clearance from walls, fences, and overhead structures.
Key placement considerations:
- Keep at least 3 feet of clearance from any structure
- Avoid placing directly under covered patios unless specifically rated for it
- Choose a spot with good airflow, since these ovens produce smoke during operation
- Ensure the surface is completely level for even heat distribution
Taking time to choose the right spot now prevents having to relocate a hot, heavy oven later.
Step 3: Assembling the Base and Components
Most wood pellet ovens require some initial assembly, typically attaching the stand or base, securing the hopper, and connecting the auger mechanism that feeds pellets into the burn pot.
Follow the manufacturer’s instructions closely during this step, particularly around the auger and ignition components, since these are the parts most likely to cause issues if installed incorrectly.
Step 4: Loading Pellets Correctly
Once assembled, fill the hopper with food-grade wood pellets specifically designed for cooking, not heating pellets, which may contain additives unsafe for food preparation.
A few tips for pellet loading:
- Don’t overfill the hopper beyond the manufacturer’s recommended level
- Use dry, high-quality pellets for consistent burn quality
- Keep extra pellets stored in a dry location to prevent moisture absorption
Step 5: The Initial Burn-In Process
Before cooking your first pizza, most wood pellet ovens require a burn-in or seasoning process. This typically involves running the oven at a moderate temperature for 20-30 minutes without any food inside.
This step serves two purposes: it burns off any manufacturing residue and helps condition internal components for consistent performance going forward. Skipping this step is one of the most common mistakes new owners make.
Step 6: Reaching Cooking Temperature
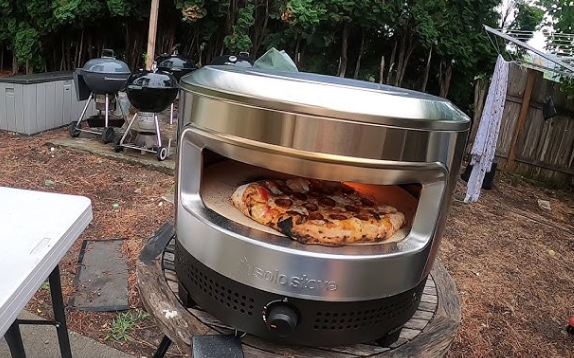
Once burn-in is complete, you can begin preheating for your first actual bake. Most wood pellet ovens take 15-25 minutes to reach optimal pizza-cooking temperatures, typically between 700-900°F depending on the model.
Use a built-in thermometer or an external infrared thermometer to confirm the cooking surface has reached the appropriate temperature before adding your pizza.
Step 7: Your First Bake
For your first attempt, keep things simple. A classic Margherita pizza is a great choice since it lets you focus on technique rather than complicated toppings.
A few first-bake tips:
- Use a well-floured pizza peel to prevent sticking
- Launch the pizza confidently in one smooth motion
- Rotate the pizza every 20-30 seconds for even cooking
- Expect a cook time of just 60-90 seconds at full temperature
Don’t worry if your first pizza isn’t perfect. Like any new cooking equipment, it typically takes a few attempts to fully understand your oven’s specific heat patterns.
Choosing the Right Oven for Your Needs
If you’re still deciding between different oven types before making a purchase, this guide on the best outdoor pizza oven for backyard use breaks down the key differences between fuel types and helps match the right option to your specific cooking style and space.
Ongoing Maintenance After Setup
Once you’re past the initial setup and first few bakes, a few habits will keep your oven performing consistently:
- Empty unused pellets from the hopper if storing the oven for extended periods
- Clean the burn pot regularly to prevent ash buildup
- Inspect the auger system periodically for smooth operation
- Cover the oven when not in use to protect it from weather exposure
Final Thoughts
Setting up a wood pellet pizza oven involves more steps than simply plugging in a gas model, but the process is straightforward once you understand what each stage requires. From careful placement and proper assembly to burn-in and your first bake, taking these steps seriously sets you up for consistent, high-quality results going forward.
FAQ
1. How long does the entire setup process take?
Including assembly, burn-in, and preheating, most users can expect the full process to take around 1-1.5 hours before their first pizza is ready.
2. Can I use regular heating pellets instead of food-grade ones?
No. Always use food-grade wood pellets specifically designed for cooking, since heating pellets may contain additives unsafe for food preparation.
3. Is the burn-in process really necessary?
Yes. Skipping this step can leave manufacturing residue in the oven and may affect long-term performance and consistency.
4. What temperature should I aim for on my first bake?
Most wood pellet ovens perform best between 700-900°F for traditional pizza, though this can vary slightly by model.
5. How do I know if I’ve chosen the right spot for my oven?
Look for a level, non-flammable surface with adequate clearance from structures and good airflow to safely manage smoke output.